When it comes to selling something online, there are about a million and one ways to do it. The place that most people start is with a simple paypal button, which essentially allows you to create a “pay me” button that a customer can click on. Once you receive notification of that payment, it's up to you to do whatever is next, like send them the product, book the meeting, etc. If all you need is a “pay me” button, then PayPal is probably all you need.
If you're a fan of Tim Ferris, then you know that the real dream of entrepreneurship is automation. Using to Paypal as your shopping cart is almost completely manual. Other than taking someone's credit card number, the rest is up to you.
Note: If you're interested in this topic but not ready to follow the guide right now, you can also download it as a PDF.
Enter: eJunkie
The great thing about eJunkie is that you can start simple, but if you want to do some more advanced things, the features are there. Want to offer a coupon code to your readers? Affiliate programs? What if you want the product to be automatically emailed to the person after they purchase it? Pay what you want sale? eJunkie's got you covered for it all.
But in this post, we're just going to focus on the basics and learn how to list our first product using eJunkie.
Step 1: Sign Up for eJunkie
At the time of writing this article, eJunkie offers a free 1 week trial, and then the service costs $5 per month after that. You're not going to find anything cheaper than that, especially with the features that are offered. If you'd like to follow along, head over to eJunkie and sign up for your trial.
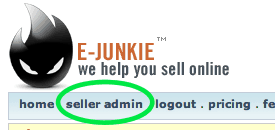
Are you registered now? Good. Now you're looking at the Seller Admin page. You can always return to the seller admin page by clicking Seller Admin in the menu:
That means it's time to add a new product.
Step 2: Add a Product
This is the time to take a deep breath. There are going to be a lot of options and boxes on the next page, but don't worry. I'm going to guide you through this. Click the Add Product link under Manage Products.
Step 3: Product Configuration
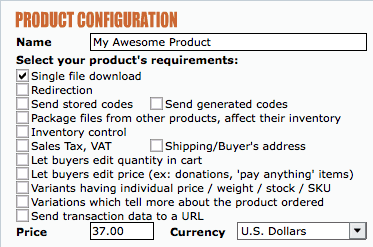
There are a lot of different options here, but for the most part, you only need to be concerned with 2 of them. First, let's do the obvious and give our product a name. Put that in the Name box.
Now the slightly trick (but not really) part.
- If your product is a single file, check the single file dowload.
- If your product is a website or a specific web address, check redirection.
Let's go with single file download for now. Now all you have to do is enter a price. Do that now:
Step 4: Optional Information
Now, over on the right side of the screen, you'll see a section called Optional Information. Namely, you can create a custom email message that goes out to buyers after they pay for your product. In general, I recommend doing this. Add a personal touch. Offer a heartfelt thank you, or give them some extra information they might find helpful.
Step 5: Upload your Product
Now it's time to upload the our product to eJunkie. Simply click on Upload Product File (Pop-Up). You can now upload a single file up to 500 megabytes. If you product contains multiple files, you can zip them up into one file to make this easier. Here's how to do that on a mac or in windows.
All done with that? Great. Click Next.
On this next screen, you can give your product an expiration date, and you can limit the amount of times the purchaser can attempt to download it. You can safely leave all these options the way they are by default.
Click Next.
Step 6: Customize your Download Page
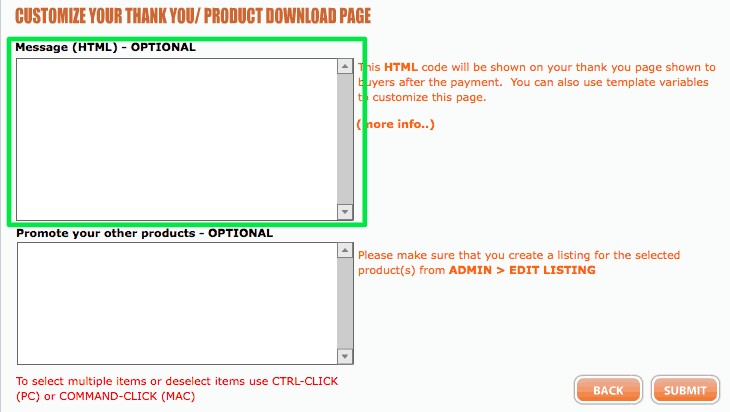
The thank you page is the page your customers will see right after they download the product. You can add any custom text you want to appear in the top box:
Finally, it's time to click Submit
Step 6: Add a ‘Buy Now' Button to your Website
This may be the trickiest step. eJunkie will “recommend” that you use their add to cart button. But in my experience, you don't want to direct people off your website multiple times. You also don't want to add additional steps between them clicking by and paying for your product. Extra steps equal extra time for someone to change their mind and abandon the purchase.
So, click on the Buy Now Buttons tab. You'll see an embed code. If you want to have an eJunkie buy now button on your site, you can simply copy and paste that embed code into the html of your page and you're all set. In case you were wondering, the button looks like this:
Fugly, right? Right.
You'll probably want to make your own buy now button that's a little nicer looking. Check out my button on the Inbox Zero Training Program. There are loads of these around the web. You just need to find one that you like and use it!
What I'm getting at, is that you can simply link to the buy now page by copying the buy now URL out of the embed code. This is underlined in green:
Want to download a PDF of these steps that you can print out and use later?
Enter your name and email below, and you'll get an instant download. You'll also be signed up for the weekly Cloud Coach newsletter, which I am pretty sure you'll love.
Click Here to Download PDF Instructions
As always, let me know what you think in the comments.


